How To Build an Outdoor Shower: A Definitive DIY Guide
How To Build an Outdoor Shower: Nothing beats a refreshing outdoor shower during summer.
After spending the whole day exercising or working in your yard, what would be better than showering outside?
It is not hard to build an outdoor shower as it requires basic construction and plumbing skills.
In this article, we will explain the step-by-step DIY guide on how to build an outdoor shower in your backyard.
This site uses ads and affiliate content as an Amazon associate earning on qualifying purchases. Disclosure.
How To Build an Outdoor Shower: A Definitive DIY Guide
Do you have a vision for an outdoor shower? Well, you can achieve the dream space that would feel like a vacation spot in your backyard by simply employing this definitive DIY guide to build an outdoor shower!
Having an outdoor shower comes with its advantages.
For instance, it offers relaxation. They also help in keeping your house cleaner because sand, dirt, and grass are kept outdoor. The idea may also entice your young ones.
You May Also Like:
How to Create an Eco-Friendly Bathroom
9 Luxurious Accessories to Transform your Bathroom Into A Home Spa
Building Regulations
The municipality will definitely regulate the plumbing works of your project. Before you make any new installation, you will have to obtain a permit. Apart from plumbing works, the municipal council may also regulate shower drainage.
In some places, your shower may be allowed to drain through wood boards into gravel drain beds. In some regions, however, this is not approved. Neither can the showers drain into stormwater drainage systems.
There should exist a connection between the showers and your home waste system. For the drainage to flow properly into your home waste system, a shower pan with a sloping design should be used.
Safety Considerations
Before you begin, check the electrical supply line and turn off the circuit breakers.
When is the Best Time to Build?
Because the process will require you to stay outdoors for long hours, it is wise to start out during warm weather.
Works involving plumbing, however, can be done during any time since they are done indoors.
Project Metrics
The Project duration is approximately 5 days. This may vary depending on your specific needs. You will need to have some basic skills in the works involved.
What Tools will you Need?
- Speed square
- Circular saw
- Cordless drill
- Drill bits
- Driver bits
- Step ladder
- Tape measure
- Jab saw (manual)
- Stud finder
- Shovel
- Bubble level
What Materials will you need?
- Drainage rock (10 bags)
- 4×4s each 8 ft. long lumber (8 in number)
- Quick-set concrete (8 bags)
- 5”×5 ½”×6 ft. Cedar fence board (18 in number)
- 2 inch and 1-inch construction screws
- Joist hangers
- Plumbing tees
- PEX pipe ( 2 pieces each 8ft. long)
- Shower faucet
- Showerhead assembly
- Caulk (silicone-based)
The following step-by-step guide will help you build an outdoor shower.
You May Also Like:
These Bathroom Mirrors Will Add a Style Statement to your Bathroom
Accentuate your Bathroom with these Storage Baskets & Shelves
15 Ideas to Beautifully Add Extra Storage to your Bathroom
Decide on the Location
While some people may prefer cold showers, hot ones are the most popular. Besides, you can tap into the hot water inside your house.
In your home, there exists a supply pipe that leads hot water from the heater to the various areas in your home.
Your bathtubs, showers, utility sinks, dishwashers, and even washing machines are supplied with hot water from their taps. Looking at this, it is best to build an outdoor shower close to these services.
This way you can choose between cold and hot water.
Find the Lines of Water Supply
Locate the lines of cold and hot water supply within your house that are closest to the point you want to build your outdoor shower. In case the lines are exposed- as is the case in crawlspaces, basements, and attics- drywall removal won’t be necessary.
If you have drywall, begin with shutting off the water at the cut-off valve.
Expose These Water Lines
You have already located the water lines. What’s next? Use stud finders to locate studs.
Afterward, mark the studs. Use the jab saw to cut a section in the drywall.
The section should be able to expose these pipes and also run any additional pipes to a height of 80 inches. This is the standard showerhead location.
Tap Into your Water Supply
In this stage, you have completely turned off your water supply. The next thing to do is cutting into the supply pipes.
Fit a tee of dimensions ½” × ½”× ½ “ into each of the supply lines.
Take your PEX pipe and push it into the ends of the tees. You should then run the pipe until it reaches the rough-in point of your shower handle.
Connect the Handle and Faucet
Install your shower handle into one side of your house as per the manufacturer’s instructions.
Cut the PEX pipes (two of them) to the required side. They should then be attached to your shower assembly.
Similarly, install the faucet and also the head. The next step is to attach the pipe to the faucet.
Set Posts
Begin by digging post holes in four locations. The distance of separation between each of the points has to be 4 feet. The result is a square shape.
Next, use your post hole digger to dig a hole of 3 feet. At each hole’s bottom, add about 6 inches of gravel.
It is now time to place the 4×4s into each hall. Check for vertical with your bubble level. Fill the holes with quick-set concrete then fill them with water.
Create the Area of Drainage
This applies for communities where gray water can drain into a bed.
You will need to dig a 3ft×3ft×12 inches hole at the posts’ center. The pit should then be filled with drainage rock.
Build your Shower Floor
Cut two-inch boards from the 2×4s. Cut five 2×4s into half. Let the ten boards rest on the inch boards.
The inch boards should be parallel to each other and spaced at 40 inches.
For the deck boards, maintain are separated by 1/8 inch. The next step would be using the construction screws to screw the boards down.
You can also consider the idea of stenciling tiles on the wood floor to give it a faux tile look.
You May Also Like: 10 Ideas To Update Your Boring, Old, Tiny Bathroom Stylishly
Build Wall Stringers
At this point, you are only left with two 2×4s.
From there, cut 44- ½ inches boards (four of them). Using 1-inch screws and the drill, attach joist hangers on the inside of the 4×4 posts.
A pair of these joist hangers have to have a height of 24 inches and the other pair 56.
Lastly, fit the boards into these joist hangers using the 1-inch screws.
If building wall stringers seems like an actual hustle for you, you want to consider vertical wood slat partitions for your bathroom walls.
They are gorgeous, add a luxury look and add overall class to your bathroom.
Wall Finishes
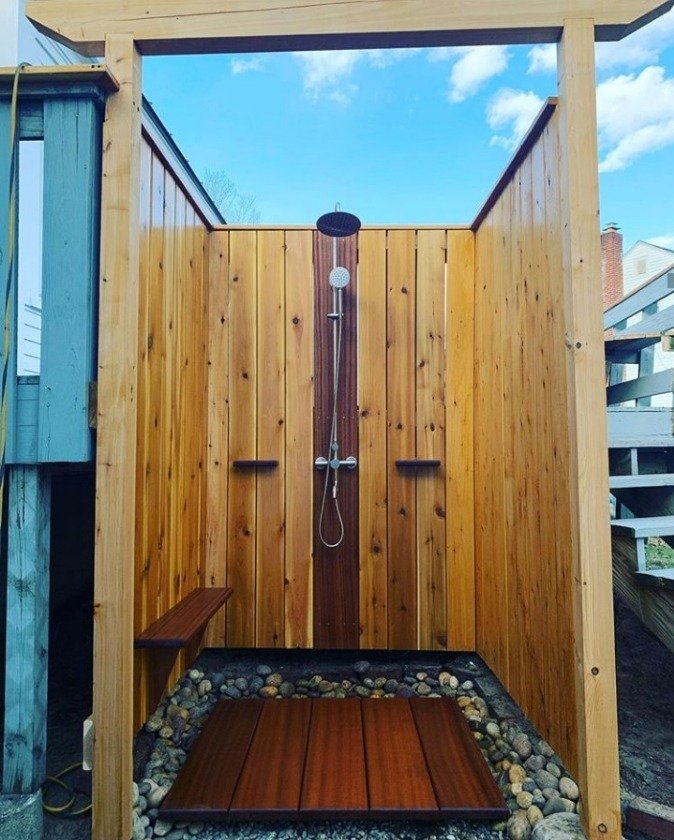
Cedar boards are a suitable finish for your outdoor shower.
You don’t have to cut the boards. It is simple to fix them. Just use 1-inch screws to screw them on the stringers.
Tips on How to Build an Outdoor Shower
Cedar boards should be left unsealed so as to achieve a silvery and natural look. Alternatively, you can stain them then seal so the wood looks more finished. This makes the wood more durable.
Because of their smooth texture and splinter-free properties, composite wood boards can be used as shower floors.
Given that outdoor showers are prone to freezing, it is no surprise that water supply pipes can burst causing flooding. Having an indoor shut-off valve minimizes this risk as it enables you to turn off the water supply to your outdoor shower.
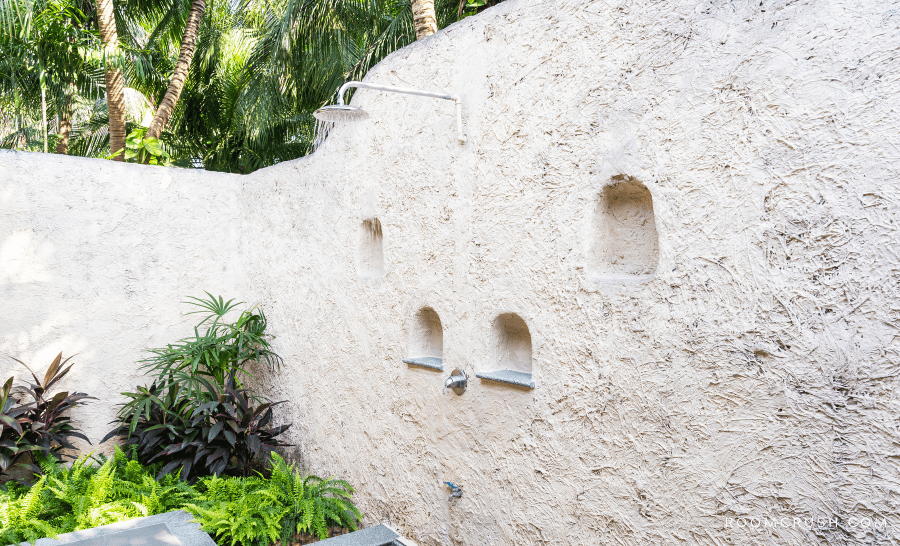
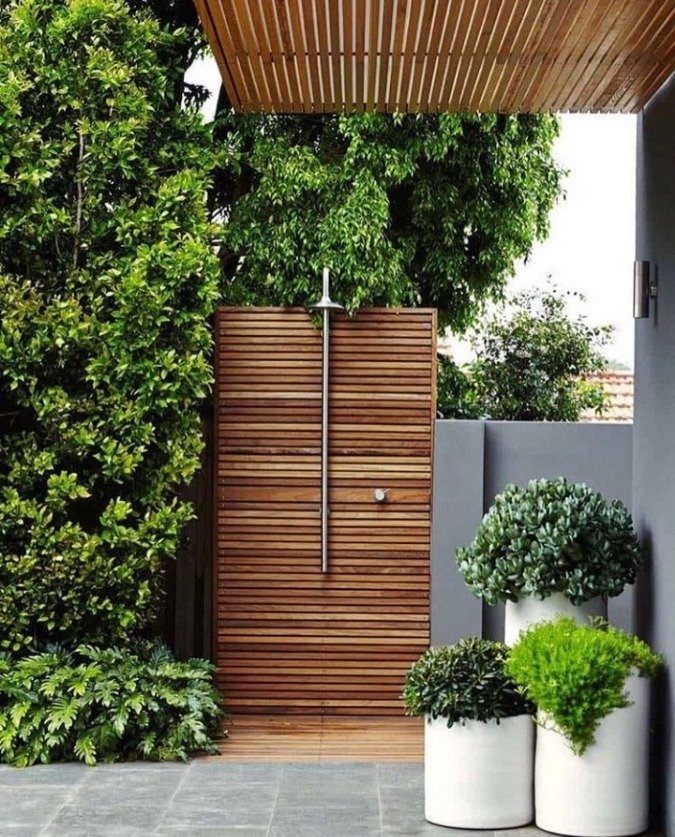
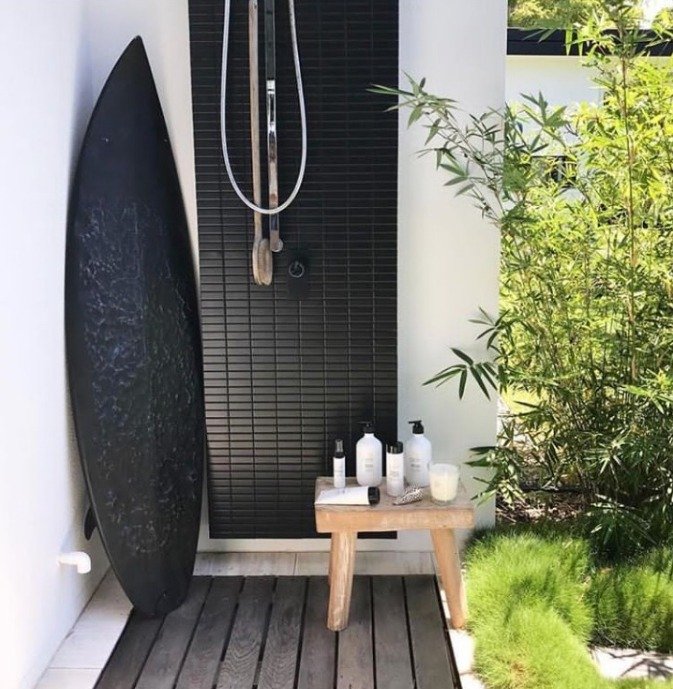
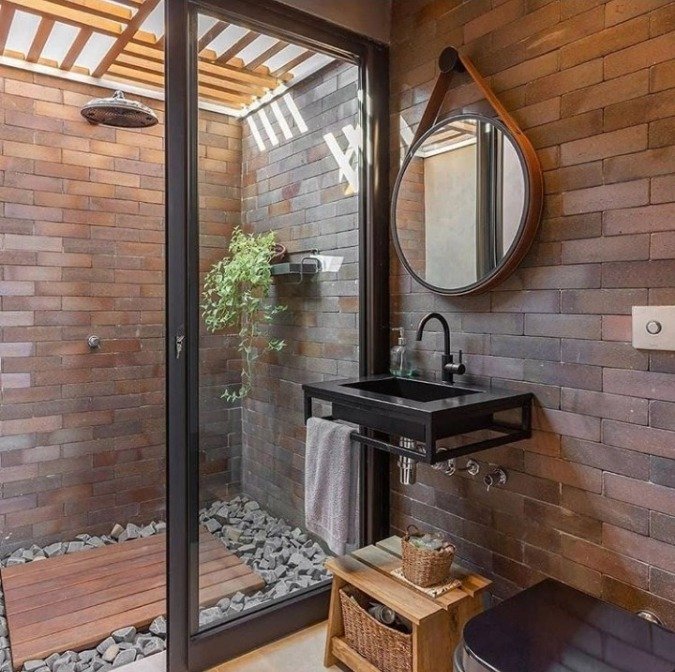
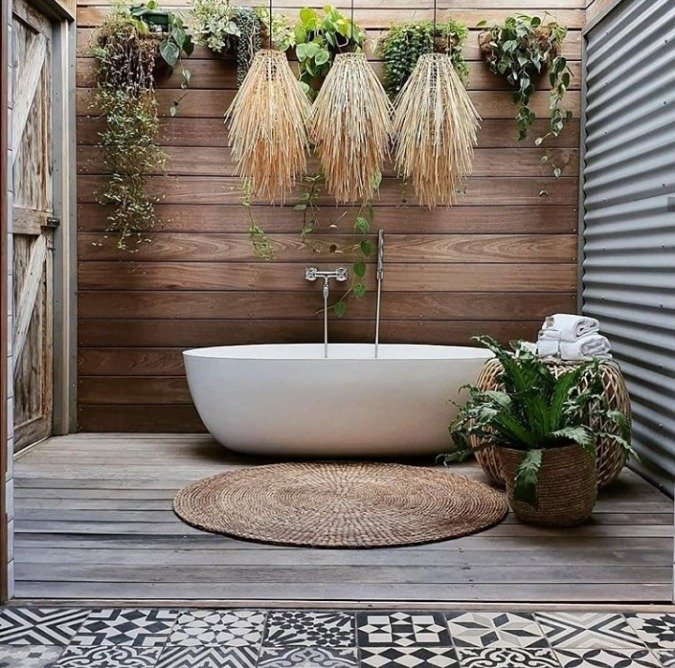
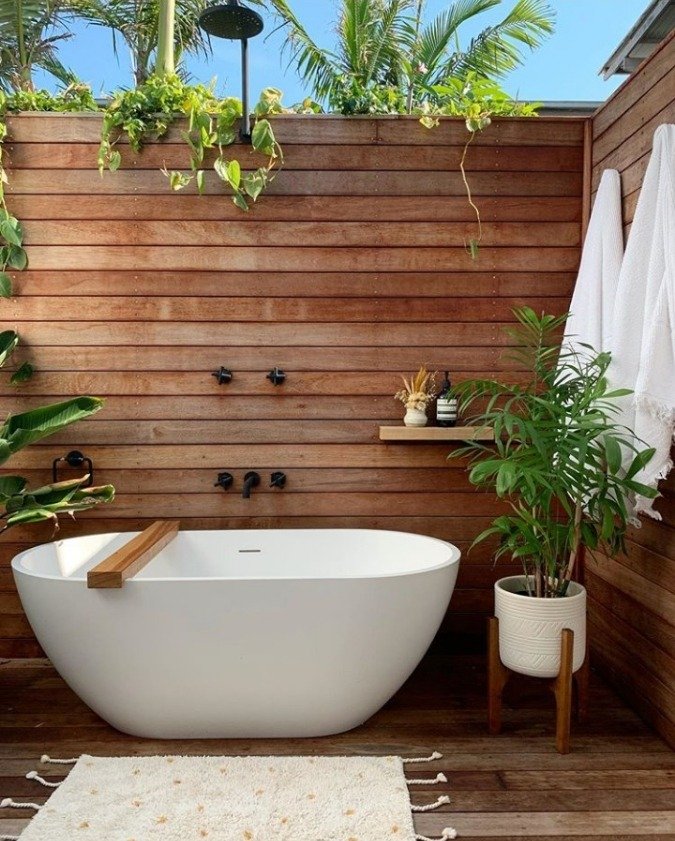
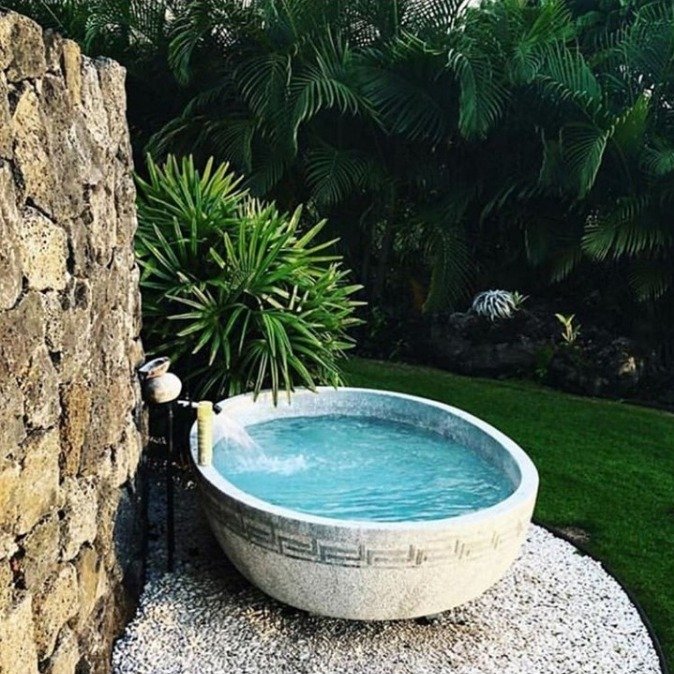
Amazing Outdoor Shower Ideas You’d Want to Try
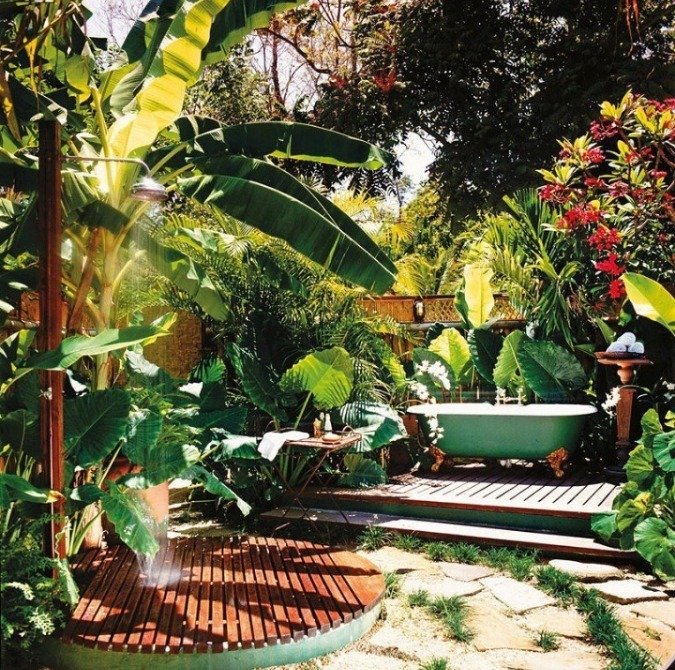
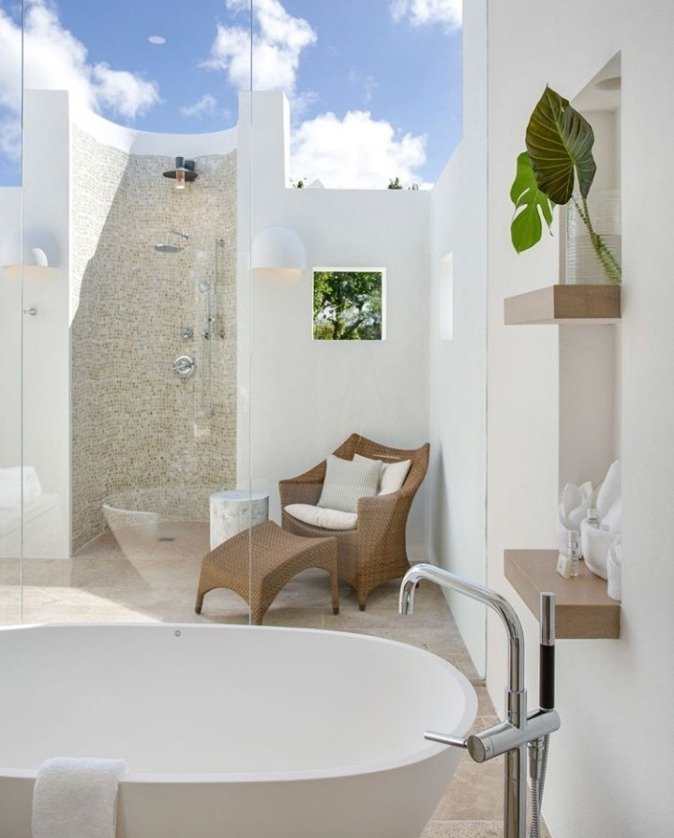
Instead of an outdoor shower, you can decide to build an outdoor bath using the above steps, only that you will need an actual bathtub instead of a shower and faucets on a post. Here are amazing outdoor bath ideas to give you some inspiration!
Amazing Outdoor Bath Ideas


There is nothing quite like having a cold shower outdoors with a warm tropical breeze or under the stars on a warm tropical night. Thus, take your DIY skills to the next level by following these tips to build your own outdoor shower!